• Skip to primary navigation
  • Skip to main content
  • Skip to primary sidebar
  • Skip to footer

Masalakorb

  • Home
  • Recipes
    • Breakfast Recipes
    • Quick Bites
    • Indian Vegetarian Recipes
      • Indian Chutneys and Raitas
      • Sambar Varieties
      • Lentils/Dal Recipes
      • Rasam Varieties
      • Paneer Recipes
      • Vegetable dry curries
      • Vegetable gravies
    • Indian Non Vegetarian Recipes
      • Chicken Recipes
      • Egg Recipes
      • Seafood recipes
    • Indian Rice Recipes
    • Indian Breads
    • Indian Chaat Recipes
    • Festival Recipes
    • Regional Indian Cuisine
    • Baking Recipes
    • Desserts
  • Basics
  • Recipe Index
  • About
  • Contact
  • Navigation Menu: Social Icons

    • Facebook
    • Instagram
    • Pinterest
    • Twitter
    • YouTube
  • Video Recipes
  • Privacy Policy
Home » Recipes » All Categories » Homemade Ginger Garlic Paste

Homemade Ginger Garlic Paste

November 24, 2014 by Padma Veeranki 31 Comments

Jump to Recipe Print Recipe

DSC_0161_ginggarlic paste-900named

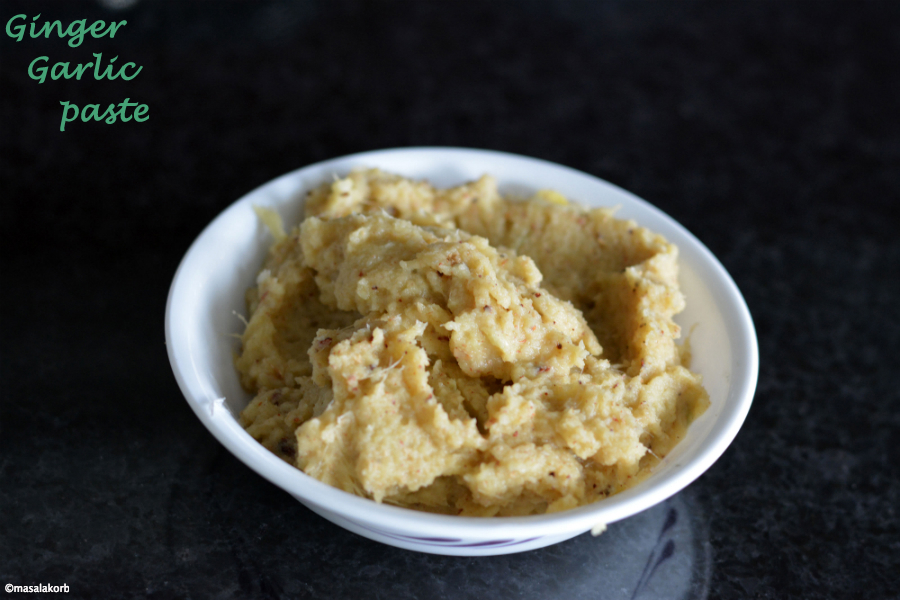
Ginger garlic paste is one of the most essential ingredients of any Indian kitchen. It is a time saver if made in bulk and lasts longer by refrigerating it. As it is going to be used in most of my recipes, I will share my version of creating this essential basic. Not only does the paste enhance the flavour of any dish, it has a great meat tenderising ability which is why it is a must have in my kitchen. Did you ever wonder how to make ginger-garlic paste at home? Nothing beats a homemade ginger-garlic paste!! I’m sure most of you already know how to make it, as there is no rocket science involved. Why don’t you try my version of ginger garlic paste?

Though preparing ginger-garlic paste at home is easy, the only time consuming task is to peel the garlic; once you are done peeling, the rest is pretty much simple. But remember, it will save your time for the next 3 to 4 weeks as it is used almost everywhere in Indian cooking.

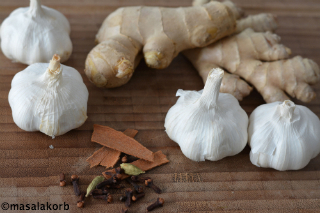
So here is a simple recipe with homemade preservatives, which aids the ginger garlic paste to last longer.First collect all the ingredients needed and keep them ready. Usually equal ratio of ginger and garlic works the best.

DSC_0147_gingarlic-320-213named

Wash the ginger well, pat dry completely and cut into small cubes. I prefer to keep the skin on as I use organic ginger, you can peel off the skin of ginger if wish to. In case you decide to keep the skin on, scrub the ginger root under water with a stiff brush. I just feel ginger looses some aroma by peeling the skin off.

Peel the skin off the garlic pods and keep them ready. The best way to peel garlic is to either soak garlic pods in water for 30 minutes and then peel or cut the tip of the garlic pod in order to peel easily. I usually prefer the second option. Pat dry completely.

DSC_0149_ginggarlic-320-213named

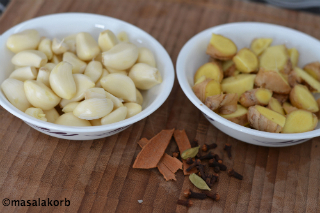
Now add some cinnamon, cloves and cardamom to the ginger and garlic pieces.

DSC_0152_ginggarlic paste-320-213named

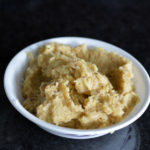
Blend all the ingredients together into a smooth paste. Grind in intervals by stirring rather than in one pulse. Make sure you do not add water while grinding as it may affect the shelf life. The oil helps in grinding.

DSC_0162-ginggarl-800-665named

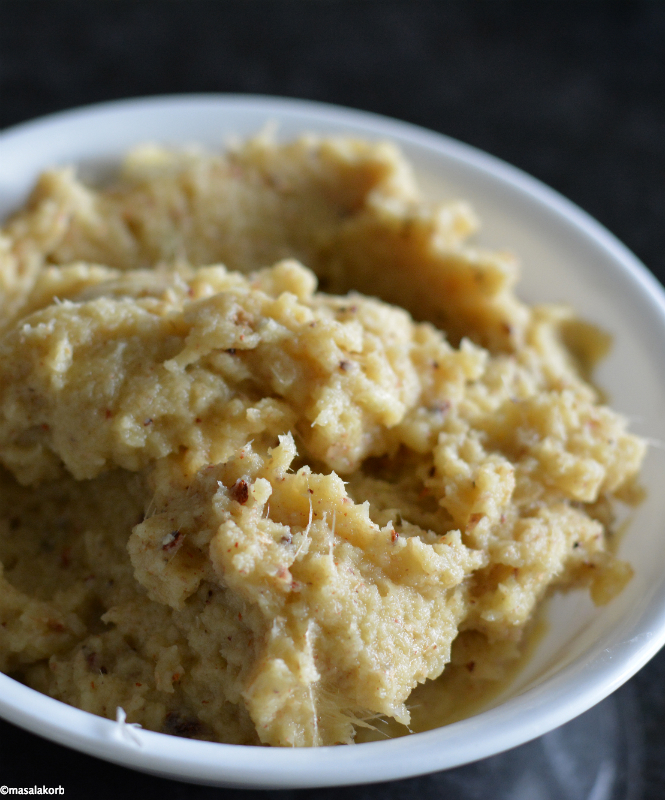
Transfer the ginger garlic paste into a clean airtight jar and refrigerate immediately. You can store the paste for 3 to 4 weeks when used with care. Ensure to use a clean and dry spoon.

Print Recipe

Homemade Ginger Garlic Paste

Simple preparation of homemade ginger garlic paste which is an essential basic in any Indian Kitchen and widely used in Indian cuisine.
Prep Time30 minutes mins
Total Time30 minutes mins
Author: Padma

Ingredients

  • 1 cup chopped ginger
  • 1 cup peeled garlic
  • 8 cloves
  • 1 inch cinnamon stick
  • 2 cardamoms
  • 1 Tablespoon oil
  • 1 and ½ Teaspoons salt

Instructions

  • Wash ginger, pat dry completely and cut into small cubes. I prefer to keep the skin on as I use organic ginger, if you want you can peel off the skin of ginger.
  • Peel the skins off the garlic pods.
  • Blend together all the ingredients mentioned in the list into a smooth paste. Grind in intervals by stirring rather than in one pulse. Do not add water, oil helps in grinding.
  • Remove paste into a clean airtight jar and refrigerate immediately. You can store the paste for about 3 to 4 weeks when used with care.

Notes

Oil and salt act as natural preservatives for longer shelf life.
You can also add ½ teaspoon of turmeric, which also act as a preservative and gives good colour.
Always use clean, dry spoon and make sure the paste is refrigerated immediately after use.
1:1 ratio of ginger and garlic works the best so try to keep the same.
Soak garlic pods in water for 30 minutes so that it can be peeled easily. Pat dry completely.
I always cut the tip of the garlic pod in order to peel easily.
My special tip:
You can even skip using garam masala sometimes in most of the dishes if you use this version of the recipe.


Receive Updates

No spam guarantee.

I agree to have my personal information transfered to MailChimp ( more information )
Thank you for subscribing.
Something went wrong.

Sharing is caring!

8 shares
  • Share
  • Tweet

Filed Under: All Categories, Know-How, Recipes Tagged With: cardamom, cinnamon, cloves, garlic, ginger, Homemade ginger garlic paste, Indian cuisine, Indian kitchen, masala, spice

Next Post: Homemade Garam Masala Powder »

Reader Interactions

Comments

  1. Margaret

    March 3, 2016 at 10:09 pm

    How would it change the recipe if I leave the cloves out? I currently don’t have any and I wanted to use this for a Honey Ginger Chicken and Vanilla rice recipe, all of which I have never attempted before.

    Reply
    • Padma Veeranki

      March 3, 2016 at 10:27 pm

      Hi…Thank you for visiting my space :). I guess that should be fine since you plan to make honey ginger chicken, so the flavour of ginger should be predominant…Do give it a try and would love to hear your feedback 🙂

      Reply
      • Vinod Reddy

        November 18, 2016 at 10:50 am

        5 stars
        Good posting madam….

        Reply
        • Padma Veeranki

          November 19, 2016 at 11:13 am

          Thank you 🙂

          Reply
  2. Neetu

    November 23, 2015 at 3:55 pm

    4 stars
    Nice tip….1 ssuggestion….in stead of soaking garlic into water, microwave them for 30 seconds, it’s skin would come out easily and since, it is not soaked in water, it’s shelf life would increase.

    Reply
    • Padma Veeranki

      November 23, 2015 at 5:06 pm

      Oh nice!!….Thank you for the tip..and visiting my space :)…will try next time 🙂

      Reply
  3. Gauri

    February 23, 2015 at 11:06 am

    Addition of the spices would surely work well with the paste 🙂 Nice post!

    Reply
    • Padma Veeranki

      February 23, 2015 at 3:57 pm

      Thank you Gauri:)

      Reply
  4. Amila

    February 22, 2015 at 10:48 pm

    I usually make ginger garlic paste for about one week and keep in the fridge.But I learned something new from me.I only use Ginger & Garlic,I don’t use cloves and other spices.But,I guess they add some flavour to the paste,isn’t it?I will try in my next batch…..Thanks for sharing.

    Reply
    • Padma Veeranki

      February 23, 2015 at 3:57 pm

      Thank you dear:)….I keep it for about 4 or sometimes even 5 weeks..It is absolutely fine…Definitely the spices add flavour and the best part is you can even skip adding garam masala in some preparations:) I’m sure you will like it Amila..Do try it out:)

      Reply
  5. Anitha

    February 21, 2015 at 6:36 am

    This is a very useful post indeed!I went through your stream and loved recipes. I had visited your stream before anyway my sincere thanks for visiting my blog and the warm invite to visit yours:)

    Reply
  6. Anitha

    February 21, 2015 at 6:36 am

    This is very useful post indeed! I went through your stream and loved recipes. I had visited your stream before anyway my sincere thanks for visiting my blog and the warm invite to visit yours:)

    Reply
    • Padma Veeranki

      February 21, 2015 at 6:57 pm

      Thank you for visiting my space…and hope this continues:)..Very happy to come across your space:)

      Reply
  7. Anu-My Ginger Garlic Kitchen

    February 20, 2015 at 11:02 am

    Wow! This is indeed an interesting twist to regular gignerg-garlic paste. Loved your addition of cinnamon-garlic. Would give it a try, and I bet the outcome would be great! Thanks for share dear Padma.

    Reply
  8. Anu-My Ginger Garlic Kitchen

    February 20, 2015 at 11:02 am

    Wow! This is indeed an interesting twist to regular gignerg-garlic paste. Lvoed your addition of cinnamon-garlic. Would give it a try, and I bet the outcome would be great! Thanks for share dear Padma.

    Reply
    • Anu-My Ginger Garlic Kitchen

      February 20, 2015 at 11:03 am

      Wow! This is indeed an interesting twist to regular ginger-garlic paste. Loved your addition of cinnamon-garlic. Would give it a try, and I bet the outcome would be great! Thanks for share dear Padma.

      Reply
    • Padma Veeranki

      February 21, 2015 at 6:55 pm

      Thanks for the confidence Anu!…I’m sure you will like it:)

      Reply
  9. alkajena

    February 20, 2015 at 7:09 am

    Very useful information.. I usually keeps the ratio to 1:1..but for cooking non veg items I increase the quantity of the garlic..I will try this variation for some of my preparation..

    Reply
    • Padma Veeranki

      February 21, 2015 at 6:54 pm

      In some Non veg curries I too do that because I grind separate masala anyway…So, this is for other general use in veg curries mainly and some Non ver fries which use only the GG paste:)…Thank you and let me know your feedback once you prepare:)

      Reply
  10. Ritu ahuja

    February 20, 2015 at 6:44 am

    Very useful post. I will make ginger garlic paste at home. Awesome. 🙂

    Reply
    • Padma Veeranki

      February 21, 2015 at 6:50 pm

      Very nice dear…Thank you:)

      Reply
  11. Savita @ ChefDeHome

    February 20, 2015 at 12:03 am

    great idea, Padma! very useful when time pressed!

    Reply
    • Padma Veeranki

      February 21, 2015 at 6:50 pm

      Thank you dear:)

      Reply
  12. Alpana Deo

    February 19, 2015 at 5:05 pm

    Nice!! Liked the twist. I will try it next time. I am sure, it will enhance the flavor. Thanks for sharing the post.

    Reply
    • Padma Veeranki

      February 19, 2015 at 7:45 pm

      Thank you and welcome to my space:)….Do let me know your feedback once you try it out:)

      Reply
  13. marudhuskitchen

    February 19, 2015 at 4:22 pm

    paste made flavourful with masalas…its different..next time will make it this way

    Reply
    • Padma Veeranki

      February 19, 2015 at 7:46 pm

      Thank you Vani…Do let me know your feedback when you make it:)

      Reply
  14. PIYALI

    February 19, 2015 at 4:01 pm

    Very useful for any kitchen. Loved the twist. Never tried this combine. So much to learn every single day. Will try this variation too.

    Reply
    • Padma Veeranki

      February 19, 2015 at 7:47 pm

      Thank you dear:)…Glad you liked it!! Do try it out…will wait for your feedback:)

      Reply
  15. Jeena

    February 19, 2015 at 3:21 pm

    Really a helpful recipe u have shared. Adding of spices sounds interesting. Too good. Thanks for sharing.

    Reply
    • Padma Veeranki

      February 19, 2015 at 7:48 pm

      My pleasure Jeena…Thank you:)

      Reply

Leave a Reply Cancel reply

Your email address will not be published. Required fields are marked *

Recipe Rating


Primary Sidebar

Meet Padma

Padma Veeranki with her props and camera.

Recipes Straight to your inbox!!

Pick a Category

Monthly Archives

RECENT POSTS

Idli Milagai Podi Recipe | Mini Podi Idli | South Indian Gun Powder Recipe

Idli Milagai Podi, gun powder, idli podi

Tamarind rice or Puliyodharai Recipe | Tamilnadu Style Puliyodharai Recipe | Pulikachal Recipe

Ulli Theeyal Recipe Kerala Style | Onion Curry Kerala Style – Onam Sadya Recipe | Ulli Curry

Small onion curry served in a copper kadai.

Bitter Gourd Stir Fry or Kakarakaya Fry | How to make Bitter Gourd Fry Without Bitterness | Easy Karela Fry Recipe

Crispy Bitter gourd fry straight from pan.

Pappu Charu Andhra Style | How to make Pappu Charu in Cooker – Andhra Sambar Recipe | South Indian Lentil Soup

Pappu Charu Andhra Style
my foodgawker gallery
Indian Food Blogs
Badge for Top 30 Indian Food Photographers 2018
Privacy & Cookies: This site uses cookies. By continuing to use this website, you agree to their use.

To find out more, including how to control cookies, see here: Cookie Policy

Footer

Instagram

Instagram has returned invalid data.

Follow Me!

Copyright © 2026 Masalakorb on the Foodie Pro Theme

8 shares