 Consuming sprouts is like eating live vegetable food. Just imagine, how nutrient-dense a growing food could be…They are in the true sense, super foods. They are alkaline, whole, pure, and natural foods. We do not take full advantage of them in spite of knowing their benefits. Sprouts are mostly considered as a poor cousin of high-fashion health foods. Today I’m going to share with you some basics in sprouting process- How to make sprouts at home?
After sprouting grains and legumes, they are recognised in our bodies as vegetables rather than starches. Essentially, the sprouting process turns grains and legumes into living plants with more nutrients available for our bodies to use. And they are easy to digest. In the beginning it may seem like a hell lot of work, but when you try it you’ll see it’s literally few minutes of activity each day. Above all it’s so much fun to see your little sprout ‘pets’ come to life.
Very recently, I started to include sprouts in my cooking. Since then, I make sprouts at least twice a week at home. I don’t eat them raw though, slightly cooked is fine with me. Making sprouts at home is a very simple task but one should use good quality beans to make sprouts. The climatic conditions play a key role in dictating the time required for the sprouting process. Sprouts are so versatile that you can be include them in many dishes ranging from healthy salads, sprouts dosa, stir fries, gravies, in various chaats to the not so healthy snacks like sprouts vada (deep fried) . Btw..check out out my recipe for sprouts dosa, if not click here.
Let’s see How to make Sprouts at home?
Source of info medindia…Click here to know more about sprouts.
How to make Sprouts at home?
You can make sprouts at home using different methods, today I’m sharing with you the method using a sprouts maker. I will not say it’s impossible without a sprout maker, but it’s simpler and you can organise it well. This is a very simple sprout maker composed of 1 separable seed growth tray. There is also a bottom basin tray to collect the water from the upper tray and a top tray (or lid) where you can pour water. The tray is designed to use water surface tension to keep the correct amount of water in the tray for all stages of the growing process. You can enjoy sprouts in as little as 3 to 4-days.
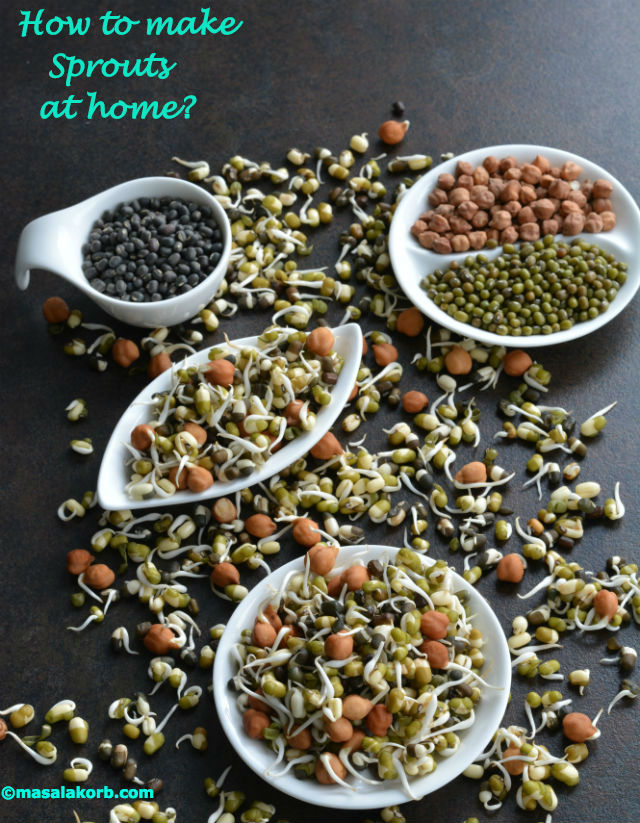
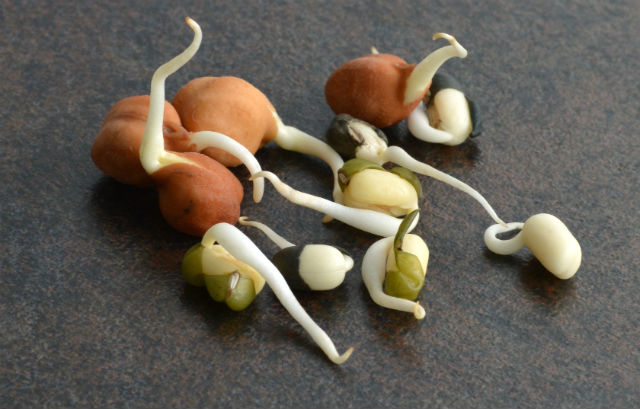
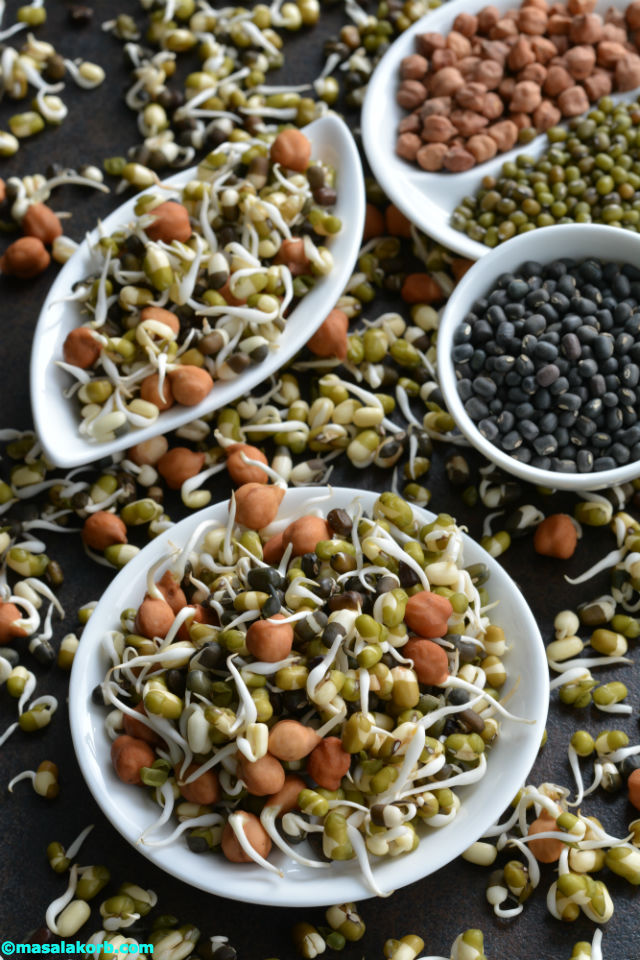
Today I’m using 3 different pulses- This is my favourite combination, though the chick peas take a little longer to sprout.
- whole green gram (Moong beans)
- whole black gram (Urad dal)
- Garbanzo beans (chick peas)
Steps:
Day 1 night:
- Clean all the pulses by checking for any stones or broken beans and remove them.
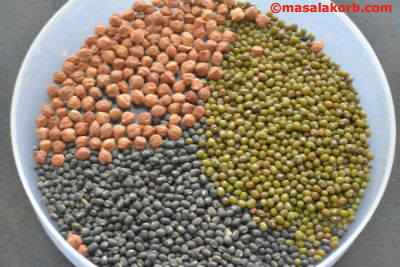
- Wash a couple of times with running water and soak them in sufficient water for at least 8 hours or overnight.
Day 2 morning:
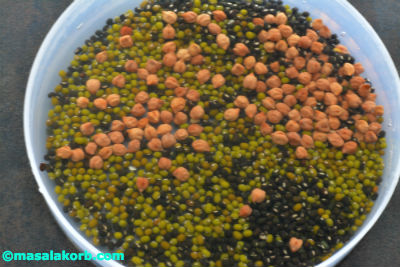
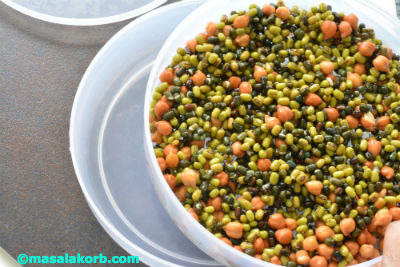
- Once you soak them, they double in size. Now rinse again and place them in a sprout maker, a container or drop them in a wet muslin cloth.
- If you are using container, cover it with a lid and place it in a dark place.
- Alternatively you can place them in a wet muslin cloth and bring the edges together and secure it loosely. Keep an eye on it and if the cloth has become dry sprinkle some water on it.
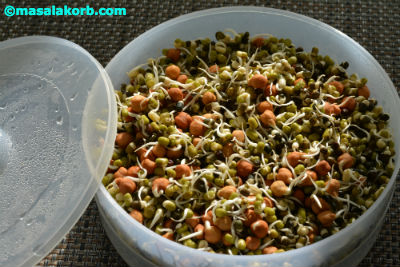
- I have placed in a the upper compartment of a sprouts maker which looks like in the pic. below.

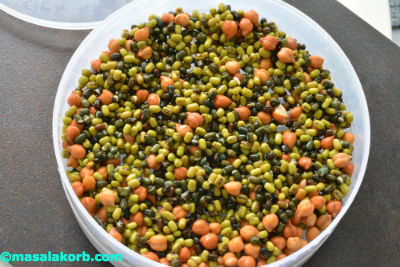
- The lower tray as shown in the picture collects the water draining from the upper tray and a top tray (or lid) is where you can pour water.
- Fill the tray with pre-soaked seeds and pour water into the top tray, The water siphons down and ends up in the bottom basin tray.
- You will need to water the seeds 2-3 times each day.
- Keep it undisturbed for at least 12-15 hours. But sprouting time totally depends on the climatic conditions. It may vary depending on where you live.
Day 3: Depending on the climatic conditions.
- If you are sprouting in a vessel you can check it after a day, if the sprouts are of at least one inch size, you can use them immediately, if not cover and keep it for another 6 to 8 hours. Do not disturb it. In colder places it might even take one full day-24 hrs. Do not keep them for too long otherwise the sprouts will become a bit sticky.
- If you are using muslin cloth you can see the sprouts popping out from the cloth and hence you don’t need to open it and see but make sure that the cloth would not become too dry in between as it will not help the sprouts to grow.
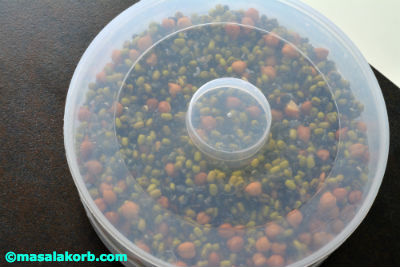
- In case you are using a sprout maker you will be able to see if they have sprouted even without opening the lid since it is transparent.
Day 3 or 4:
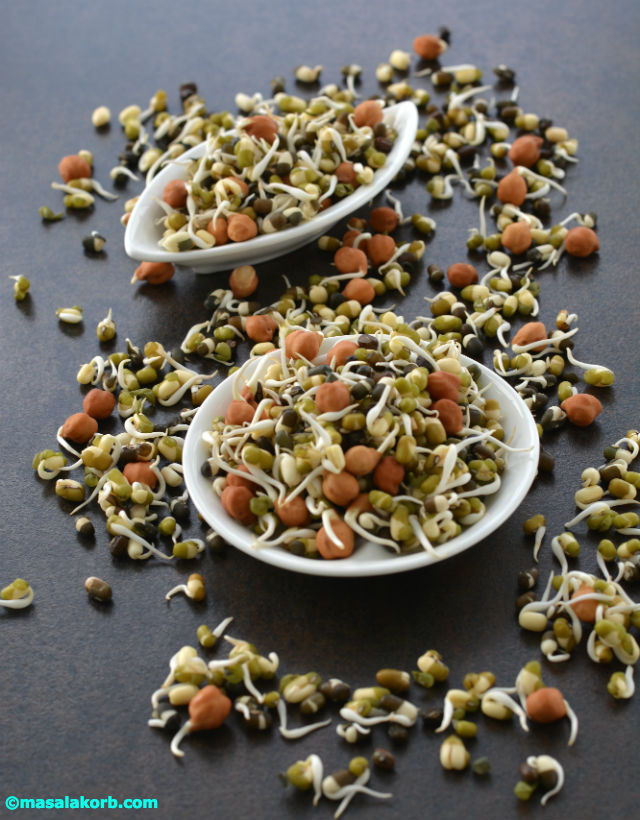
- The pulses will completely sprout and they are ready to use.
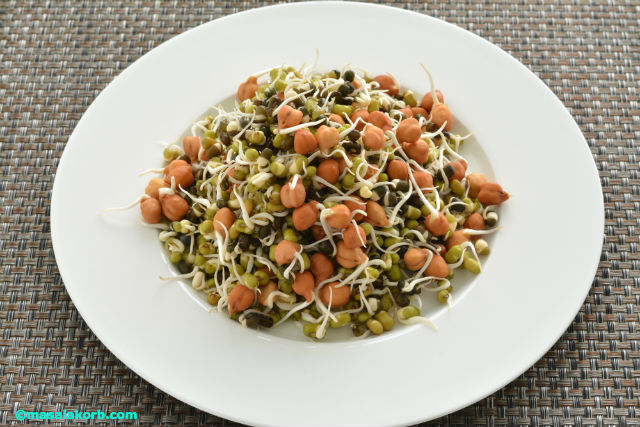
Sprouts are so versatile that you can be include in many dishes ranging from healthy salads, sprouts dosa, stir fries, gravies, in various chaats, and sprouts vada…..coming soon!!
How to make Sprouts at home?
Ingredients
- ½ cup whole green gram Moong beans
- ½ cup whole black gram Urad dal
- ½ cup Garbanzo beans chick peas
- 4 to 5 cups water to soak the pulses
Instructions
- Day 1 night:
- Clean all the pulses by checking for any stones or broken beans and remove them.
- Wash a couple of times with running water and soak them in sufficient water for at least 8 hours or overnight.
- Day 2 morning:
- Once they are soaked, they double in size. Now, rinse again and place them in a sprout maker, a container or drop them in a wet muslin cloth.
- If you are using container, cover it with a lid and place it in a dark place.
- Alternatively you can place them in a wet muslin cloth and bring the edges together and secure it loosely. Keep an eye on it and if the cloth has become dry sprinkle some water on it.
- If using a sprout maker, place in the upper compartment of a sprouts maker which looks like in the pic. below.
- The lower tray as shown in the picture is where the water drained from the upper tray is collected and a top tray (or lid) where the water is poured.
- Once the tray is covered with pre-soaked seeds, water is poured into the top tray,
- The water gets siphoned down and ends up in the bottom basin tray.
- You will need to water the seeds 2-3 times each day,
- Keep it undisturbed for 12-15 hours. But sprouting time totally depends on the climatic conditions.
- Day 3 or 4: Depending on the climatic conditions.
- If you are sprouting in a vessel you can check it after a day, if the sprouts are of at least one inch size, you can use them immediately, if not keep it covered and undisturbed for another 6 to 8 hours. In colder places it might even take one full day-24 hrs. Do not keep them for too long otherwise the sprouts will become a bit sticky.
- If you are using muslin cloth you can see the sprouts popping out from the cloth and hence you don't need to open it and see but make sure that the cloth would not become too dry in between as it will not help the sprouts to grow.
- In case you are using a sprout maker you will be able to see if they have sprouted even without opening the lid since it is transparent.
- Day 3 or 4:
- The pulses will completely sprout and they are ready to be used.
- Sprouts are so versatile that they can be included in many dishes ranging from healthy salads, sprouts dosa, stir fries, gravies, in various chaatss, and sprouts vada which I will be sharing very soon.
Notes
If the sprouts become slightly sticky, it means you have kept them for longer than needed. Just rinse them and use.
You can follow the same process for various beans. The sprouting time varies from bean to bean and also depends on the climatic conditions.
Try out popular posts using sprouts- sprouts dosa, sprouts vada and sprouts coriander dosa…and many more to come!….Stay Tuned !!
Happy Cooking 🙂
Padma
